
Authored by Jason Smith, senior scientist for The Garland Company in Cleveland, Ohio, an originally published in Coatings Pro Magazing.
A coating lacks intelligence. It does not have sentience. A coating cannot decide to wet out over one area and not on another area, even if those areas are 5 feet (1.5m) apart. A coating cannot sense rain coming and know to speed up the cure rate and skin over before the first drops start to fall.
Because coatings lack intelligence, it is the formulator’s job to bring together the necessary raw materials to give the coating the best chance of longevity in whatever environment it will be applied and exposed to in its “working life.”
Some coatings are labeled “smart” insofar as they are purposely designed to receive aa signal from a stimulus (e.g., light, pH, pressure, or temperature), which, in response, induces a chemical or physical process, such as a color change, a current conduction, or a self-heal.
The extent of the coating’ “smarts” does not exceed the limit of the ability of the raw materials to perform these chemical or physical processes. Even the smartest coatings can fail for the same reasoning as any other coating on the market. This article aims to show how roof coatings fail and to aid the contractor in determining root causes of these failures before calling the manufacturer. The information gathered from these observations allows the contractor to contact the manufacturer from a position of knowledge to help solve problems faster. A faster solution is a better solution!
Types of Roof Coating Failure
There are a myriad of failures that can and do plague roof coatings, so we have focused on a few common failures here. (For a wider range of failures, refer to the references at the end of this article).
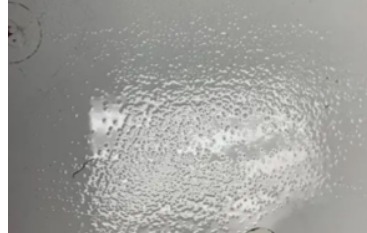
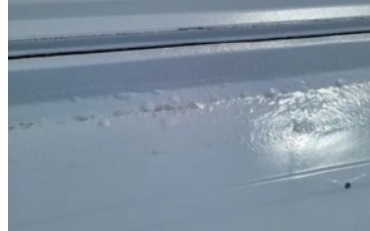
Cratering
Cratering occurs during a coating’s drying or curing process when a bubble is popped on the surface of the coating, but the coating only partially flows back into the space left behind. The bubble forms here for a number of reasons, which can include:
- Air was whipped into the coating during mixing;
- The surface may have been damp, and carbon dioxide bubbles formed during the moisture curing process;
- The solvent used in the formula flashes or evaporates slower than the coating takes to set up, cure, or coalesce;
- The nap thickness of the roller or the brush type used draws unwanted air bubbles into the coating;
- The coating was applied at the wrong time of day;
- The surface is too porous.
There are ways to control cratering that include allowing paint that has been stirred pr mixed to sit a few minutes to help disperse air bubbles that may have become entrapped. Another recommendation is to reduce the nap thickness of the roller being used by one size. And it is important to stay within the manufacturer’s recommended application temperatures.
Temperatures and viscosity, a measure on how the product “feels” when stirring and applying, are inversely related. Lower application temperatures cause the coating to thicken, meaning trapped bubbles diffuse slower to the surface and when they finally pop, the coating is too slow to backfill the depression. The ability to read and understand the weather is an important skill for a contractor.
Cissing and Dimpling
Cissing and dimpling – also known as fisheyes – are similar to cratering, but the primary difference is what is causing the defect. Where bubbles or bubble remnants are the cause of cratering, surface defects cause cissing and dimpling. Cissing occurs when the coating exposes a small spot of the substrate, usually around 1-43 mm (0.4-0.12 inch) in diameter. Dimpling looks like cissing, but the substrate has not been exposed. The defects are observed easier over smooth surfaces, such as metal or single-ply roofs where residual processing oils or engrained greases near vent pipes could interfere with the coating wet out. Cause include:
- Surface contaminants
- Unauthorized thinning and incompatible thinners.
- Remember, the coating “arts” exactly as it is supposed to over the surface it’s applied on. Therefore, if the surface has dirt on it, the coating will stick to dirt and act as it should over dirt, which typically means eventual delamination from the intended substrate. The manufacturers should have surface preparation instructions in an application guide.
If there is doubt, it is best to reach out to your manufacturer’s representative before the coating is applied.
Follow the manufacturer’s recommendations on thinning. Some manufacturers do not permit any thinning of their product for the simple reason that the solvent employed may not be compatible with the resin system; it could evaporate differently or it could interact with the surface to change the wetting properties. In a moisture-sensitive coating, adding a solvent would unintentionally introduce water that would prematurely initiate the curing reaction or make the coating much weaker after curing, not to mention the risk of gelling within expensive hoses and pumps if spraying.
The surface to be coated must be clean and dry per the manufacturer’s instructions. When in doubt, clean again. Perform an initial “big clean” over the entire surface. Then, because objects fall on the roof during the day, focus on cleaning the immediate work area prior to applying the coating, pushing debris to an agreed upon disposal area as the work progresses. Wipe metal with acetone or another polar solvent to remove traces of processing oil or grease that could interfere with coating wet out.
Grinning
Grinning is related to the coating’s opacity and describes. The inability of the top coating to properly hide the previous coat or the original surface. Causes include:
- Improper or inadequate mixing before application;
- Uneven application of the coating;
- Unauthorized thinning with solvent;
- Applying too few coats.
When the coating is applied too thinly, it does not reach its full strength and creates a weak spot in that area, a likely candidate for future issues such as tearing. Follow the manufacturer’s application rate. There are some coatings that are formulated to cure or dry better at thin applications versus thick applications, and depending on the formula, those thin applications can be recoated in the same day.
It is also a good practice to mix any coating before applying it to incorporate any potentially settled filler or separated resin; this is usually a manufacturer’s requirement stated in application guides and technical data. A coating can appear mixed, but it might not be. Most coatings are formulated so that after the mixing of their components prior to application, nearly 100 percent of its components (e.g., binder, pigments, fillers, solvents, and necessary additives) are present at the start of its work life on the roof. Not giving the pail a cursory mix means that less than 100 percent of the materials necessary to give the coatings its properties are present to start, and, therefore, it is commencing its work life at a disadvantage. Remember, to avoid cratering, let the mixed dual-component coating sit
9if able) for a few minutes before applying.
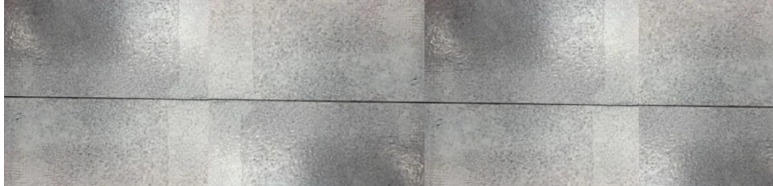
Mud-Cracking
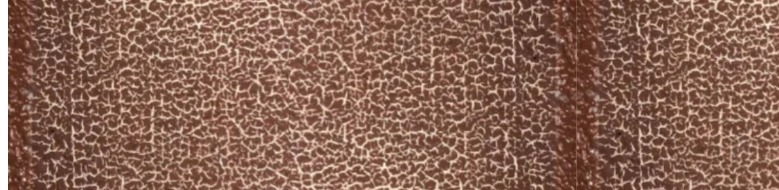
Mud-cracking, or just cracking, is a stress-related failure with several causes that include:
- Coating is applied thicker than recommended;
- Solvent flashes out before resin can form a film;
- Resin strength and/or flexibility is not sufficient at that thickness to hold cohesively;
- The system absorbs or desorbs too much moisture and dries out; this is similar to what happens to soil in an arid environment.
Just as not applying enough coating causes issues (see grinning), so, too, does applying too much coating at once. Again, heed the manufacturer’s application rate. While the manufacturer’s representative should be able to help you choose the right roof coating for the application, the more information that you or the customer can provide about the system being installed and the condition of the roof will help ensure the proper choice is made.
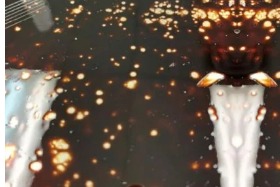
Bubbling
Bubbling is a type of blistering that is caused by pressure applied under the coating; referred to as non-osmotic pressure, and it is observed under the following conditions:
- When the coating is applied over a porous surface;
- When the coating is applied over moisture;
- When the coating is applied during high or low temperatures outside of the recommended application temperature window;
- When the coating is a moisture-cure coating or even a two-part coating that is particularly sensitive to water.
Bubbles form because of substrates and environmental conditions during applications. By way of analogy, applying a coating over a porous surface can cause a scenario not unlike draping a tarp over a small pothole in that the coating does not wet out into the depression but bridges that space. Once it’s cured or dried, and provided the “tent” has not broken, the coating could be stretched like a small balloon due to the air completing its neutral expansion nd contraction throughout the day. The stretching creates a bubble over that pore.
Moisture-cured polyurethanes rely on moisture to progress the polymer formation of the resin while any solvents are flashing from the coating. The byproduct of this reaction is the formulation of the resin while any solvents are flashing from the coating. The byproduct of this reaction is the formation of carbon dioxide, which must escape from the coating before the polymer becomes too thick. Applying the coating over moisture adds excessive moisture to the system, creating too much carbon dioxide in a short amount of time. The result is a bubbly surface,
Temperature is a driving factor in the cure or dry rate of a coating. Applying the coating outside of the manufacturer’s recommended application temperature zone creates a situation where too much or not enough thermal energy is present to help facilitate the moisture cure reaction, flash off solvent, and provide the means for the bubble to flow to the surface and pop before the coating becomes too thick.
Blistering
Blistering and bubbling are often confused for the same thing. In reality, a bubble is a type of blistering caused by a specific phenomenon, whereas a blister can form from multiple mechanisms. The primary force involved with blistering is pressure from moisture exerted through the coating, typically referred to as osmotic pressure. Causes of blistering include:
- When there are temperature differences across the coated substrate;
- When conditions are hot and the surface of the coating dries too rapidly and traps solvent in the underlying film. The heat in the air vaporizes and expands the solvent under the film and causes a blister;
- When the coating is applied to metal substrates (i.e., steel that has been exposed to high levels of moisture);
- When a substrate has been contaminated with a water-soluble salt.
Blisters and bubbles also differ in that blisters are liquid filled whereas bubbles are filled with gas, with the same principles that exist in, say , a helium-filled balloon. If filled in a warm room and taken to a cold outside, the balloon shrinks; likewise, if the balloon is filled in a cold environment and placed in a warm room, a pop could ensue because the pressure and volume are expanding beyond the balloons rupture point.
Water, both the liquid form and vapor form, has the ability to apply sufficient force to push itself into and even through semi-permeable coatings. Tests during the formulation of coatings, such as ASTM D570, Standard Test Method for Water Absorption of Plastics, exists to help predict the amount of solvents, such as water, that are absorbed into the coating over time. The information gathered helps provide the right solutions for the specific environments. For example, it would be unwise to choose a coating with a saturated water absorption value over 50 percent, meaning that the coating absorbs 50 percent of its initial mass in water, for an area that would be submerged under water for longer than a day or two.
Key Takeaways
The common threads of this article can be summarized to four major points:
- Surface preparation, cleanliness and dryness prior to a coating application is paramount to ensuring the coating will perform as it was formulated to do. It is also a step that is mostly in the contractor’s control.
- Mix the contents in the cans, buckets, or drums before use. Always assume raw materials settle in the package. By the time the contents of the pail or drum are poured out onto the roof, nearly 100 percent of the ingredients present. Some of that loss may include crucial additives that prevent bubbling, help with wet out, improve hide, or have other important properties.
- Apply the coating at the recommended thickness, and if multiple coats are recommended, do not try to “save time” by lumping multiple layers into one coat. Most often, blisters or other surface defects that can occur.
- Pay attention to the weather. Temperature and humidity play a major role in how a roof coating will apply, cure, and start working. The application process does not end with hour as the coating dries, coalesces, or cures. Therefore, it is important to understand the weather conditions prior to and after the application. The manufacturer recommendations on application temperatures must be followed to get the most out of the cured film.
A trained roof coating professional from the manufacturer is an invaluable source of information and solutions. Take advantage of the person’s knowledge ahead of time to be sure that once applied, the coating achieves optimal performance.
Jason Smith is a senior scientist for The Garland Company in Cleveland, Ohio. He has multiple U.S. and foreign patents directly related to roofing, and he has written several articles related to coatings formulation, applications, and government regulations. Smith has a bachelor’s degree in chemistry from The University of Pittsburgh and a master’s degree in polymer chemistry and coatings from DePaul University in Chicago. For more information, contact: Jason Smith, jasonsmith@garlandind.com.
